PEER2PEER Transboundary Water Security
PEER2PEER Transboundary Water Security
Google Earth Engine Training 2025
View the Project on GitHub
UCI-CHRS/GEE-Training-2025
Contents:
Contents:
Get started with the Google Earth Engine Python API
To start, make sure you are logged in to your Google account.
Step 1: Create a Google Cloud project
1. Visit https://console.cloud.google.com/earth-engine
If prompted, select your country and agree to the terms of service.
2. Click on “Select a Project”

3. Click on “New project”’

4. Enter a project name (this can be whatever you want), and select “No organization”. Note your project ID, which may be slightly different from the project name. You’ll need this later to authenticate.
5. Click “Create”

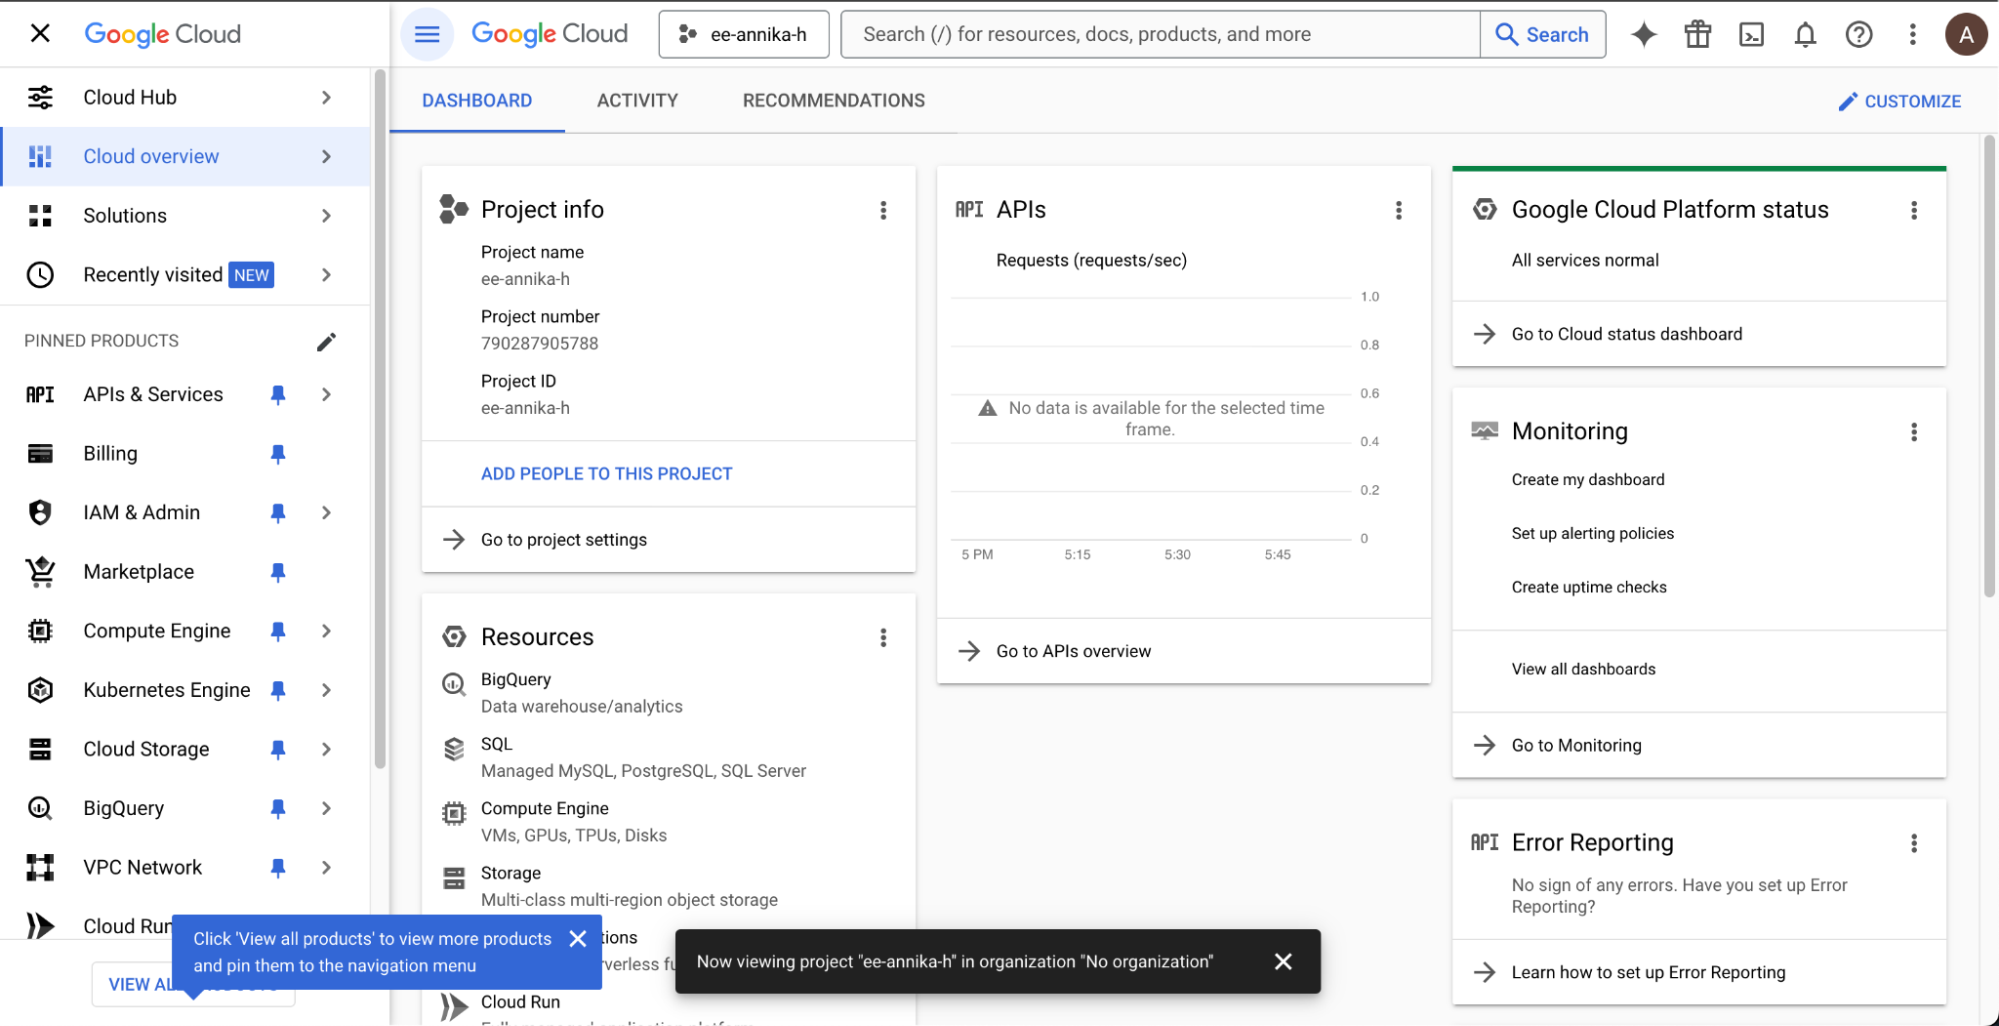
Step 2: Enable Google Earth Engine API for your cloud project
6. After creating your project, click on “Select Project” under Notifications. This will show the dashboard for the Google Cloud project you just created. This will take you to console.cloud.google.com/home/dashboard

7. In the search bar at the top of the screen, type in “google earth engine” and select “Google Earth Engine API” in the search results.

8. Click the “Enable” button.

Step 3: Register your Google Cloud project as non-commercial
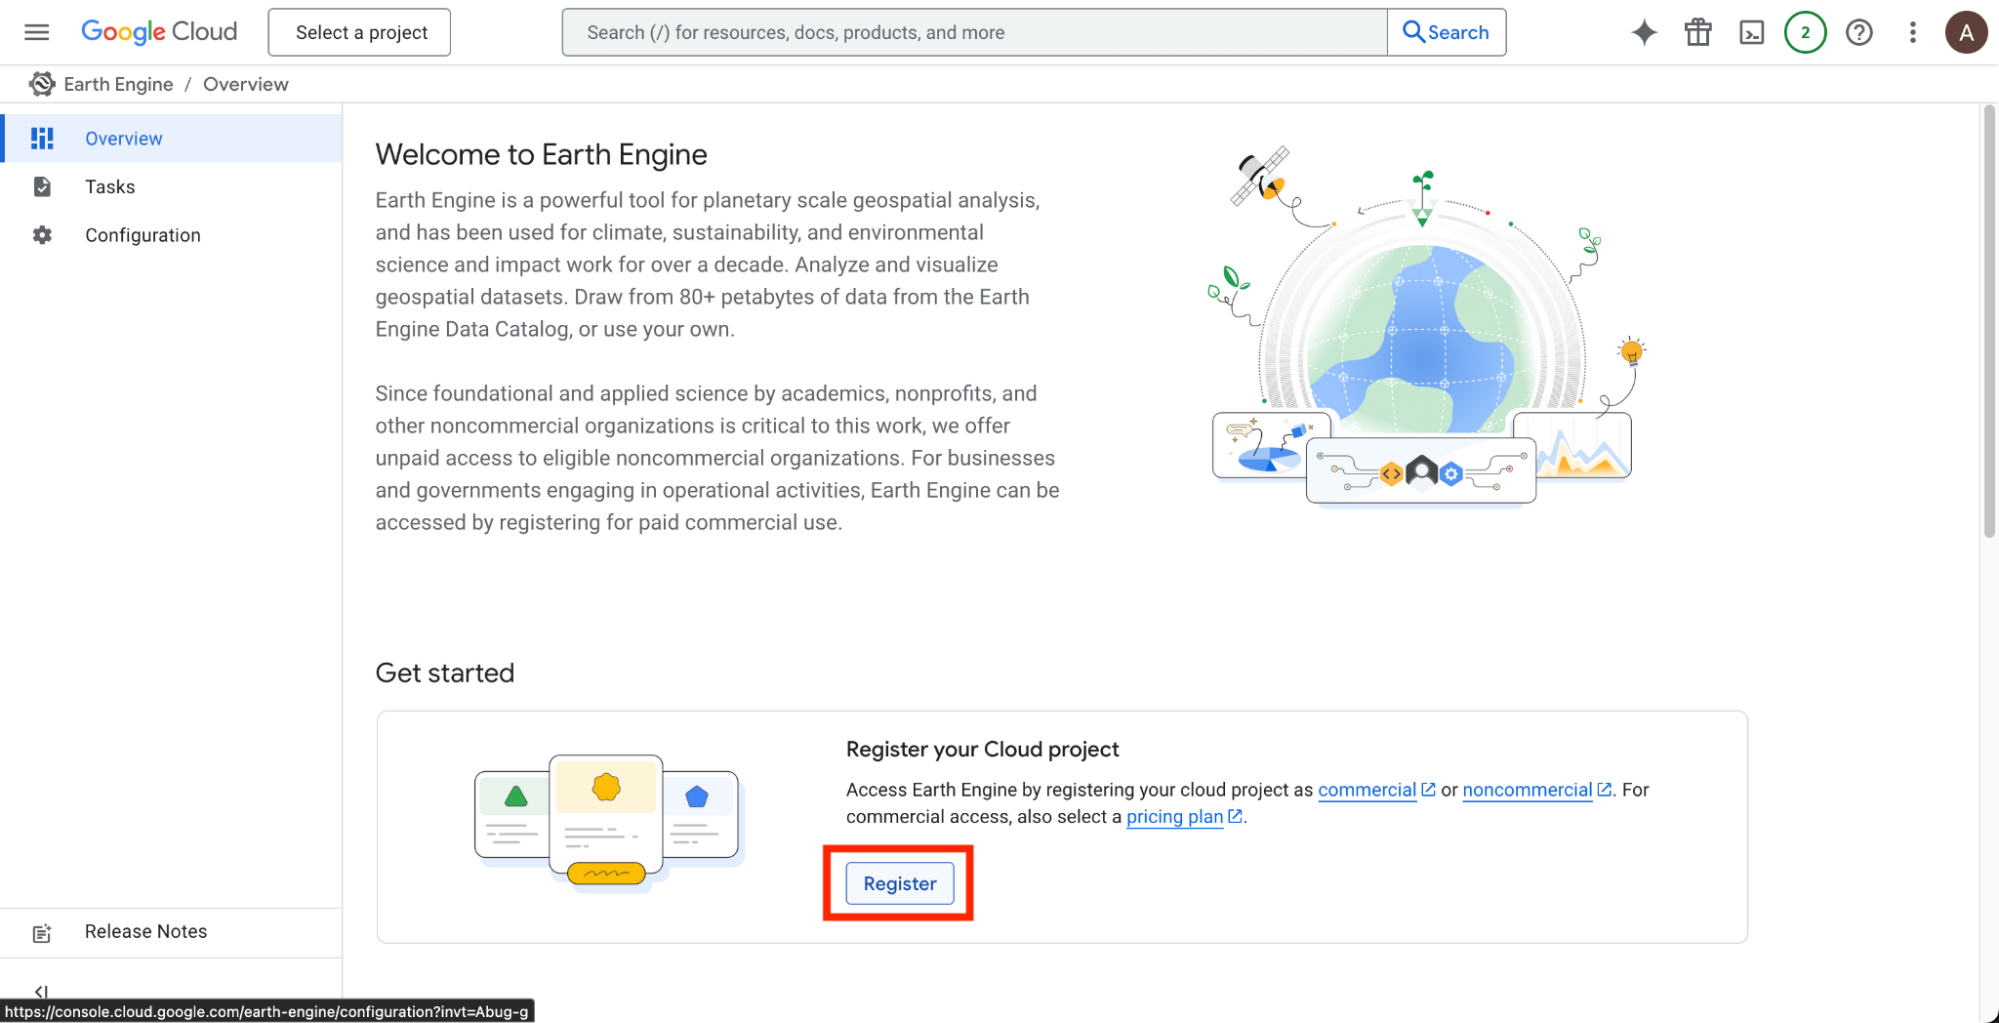
9. Return to https://console.cloud.google.com/earth-engine
10. Under “Register your Cloud project”, click the “Register” button.
11. Under “See if you are eligible for noncommercial use”, click “Get started”.

12. Under “1: Select your organization type”, choose “Public or private academic institution”
13. Click Next

14. Under “2: Check noncommercial eligibility”, make the selections in the following screenshot. (If you are affiliated with the University of Dar es Salaam or another academic institution, you may list that instead of University of California Irvine.) Make the selections in the following screenshot.

15. Click the “Check eligibility” button
16. A grey box indicating that you are eligible for noncommercial use should show up. Click Next.

17. Under “3: Choose your plan”, click Next

18. Under “4: Describe your work”, select Freshwater.
19. Click Next

20. Click the blue “Register” button.


Step 4: Open a Colab notebook and authenticate with your Google Cloud project ID
21. Visit https://colab.research.google.com/ and click + new notebook

22. Paste the following text in the notebook cell, replacing PROJECT_ID with the project ID from your Google Cloud project (making sure it is enclosed in ‘quotation marks’):
import ee
ee.Authenticate()
ee.Initialize(project='PROJECT_ID')
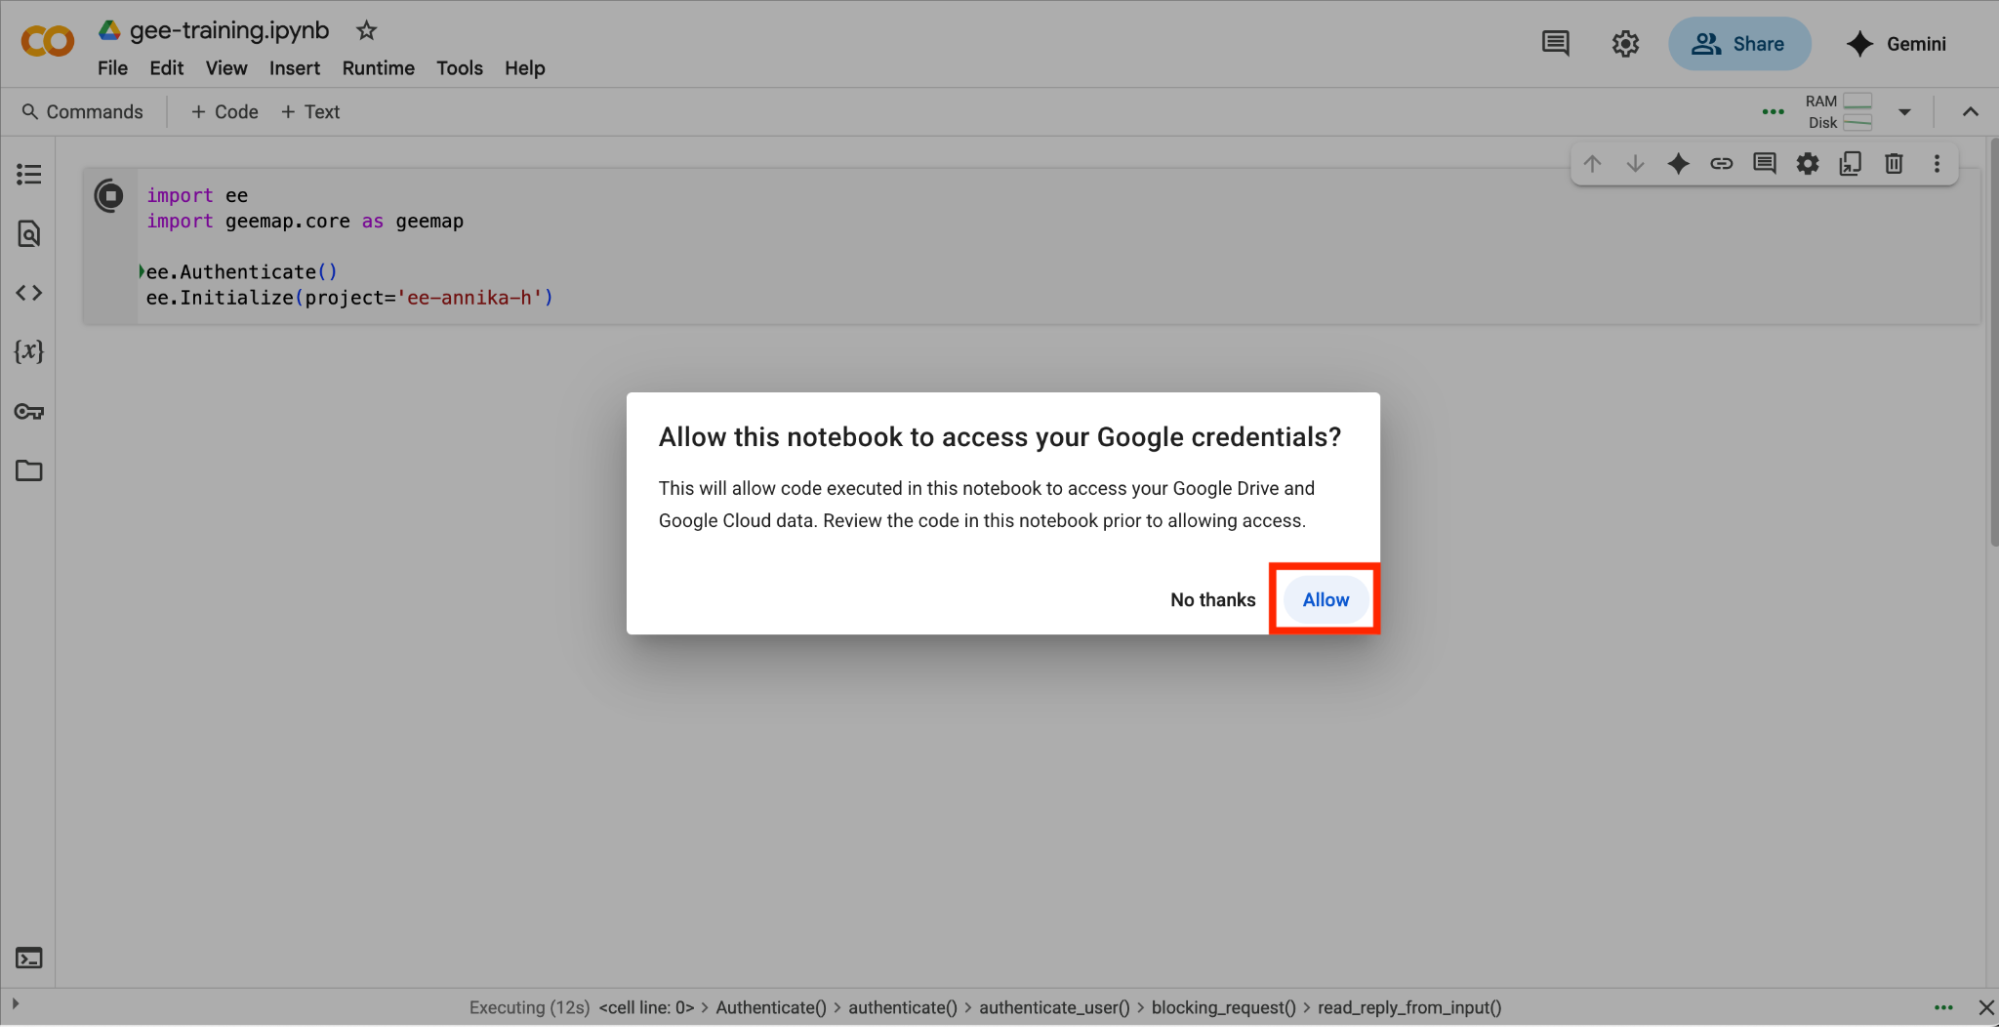
23. Click the run button (triangle in a circle) on the left side of the notebook cell

24. Click through the prompts requesting access to your google account (allow all)
25. You’re ready to start using Google Earth Engine! Click + Code to add a new notebook cell.

26. Paste the following code into a code cell to verify that the ee module is working as expected. If running the cell produces no errors, you are all set!
image = ee.Image("NASA/ASTER_GED/AG100_003")
print("success!")